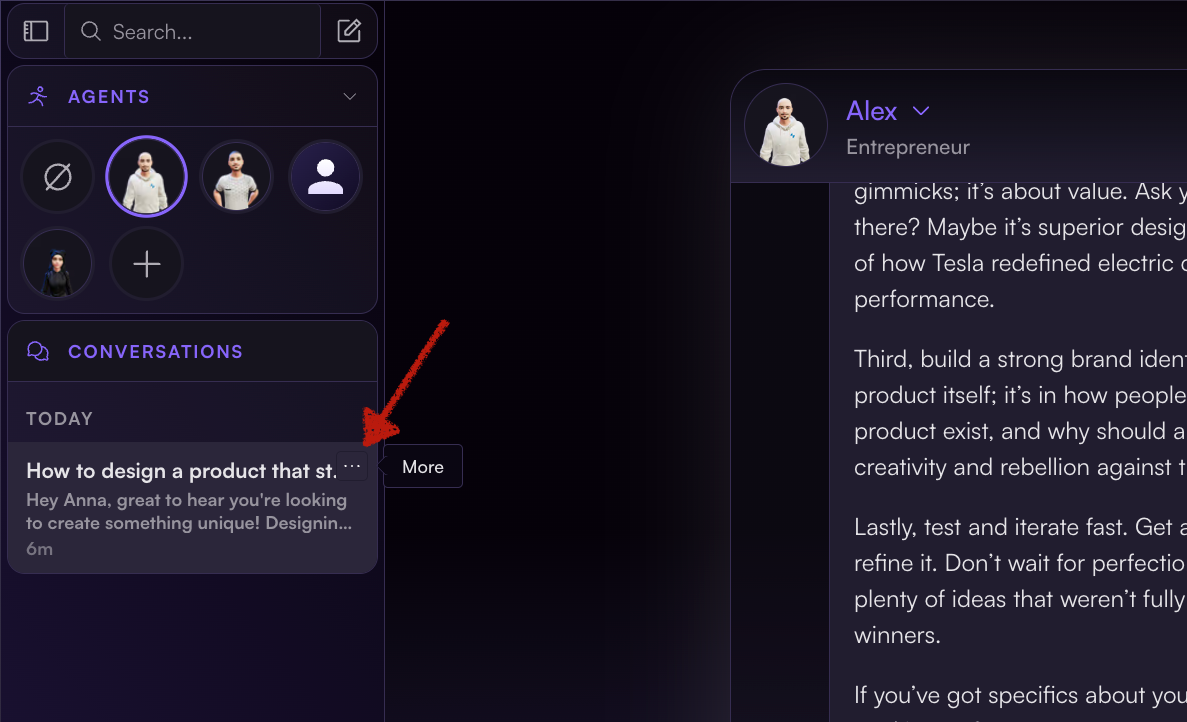
Renaming a conversation in Agent.so is a breeze and can be done in just a few quick steps:
Start by opening the conversation you wish to rename. You can find it in your Chat History with an Agent. Here, you'll see three dots. Go ahead and give those a click.

A drop-down menu will appear. From this menu, select the "Rename" option.

You can enter the new name you want for your conversation. So go ahead, type in the new name! Once you're happy with the new name, don't forget to save it!
After renaming a chat, any shared conversations associated with it will now show this new title.
The new title will also be visible in the conversation history area of the chats. So, it is easy to do and keeps everything tidy and easy to find.